Series D details

ClassicBiker

Well Known and Active Forum User
VOC Member
Thanks Ian, I am at that point of determining where to drill SL1 fiberglass cowl for fit to SL3 bracket. Even though it may not match side/side exactly, it appears reasonable to simply drill.
BUT.... am considering the verticalness of the headlamp. D men what is the correct headlamp vertical position? It looks like Ds sit "tail high" , so?
I request photos of -
FF85 bracket
SL16 bracket
Also how do I cut out for speedo and gauges without damaging gel coat?


Craig,
I've seen the photos you've posted of your Comet on theVincent.com, It looks really good.
I haven't any experience with fiberglass but when cutting Plexiglas, lexan, etc .... I put a layer or two of masking tape on each side of where I'm cutting to prevent chipping and scratching. I've got a friend who works in the leisure boat industry, and see what he says, he's worked a quite a with fiberglass boats.
Now my turn to ask a question. What stops the fairing SL1 pivoting where it attaches to SL3 and tipping forward? Is it just the steering damper extension passing through the instrument panel, or am I missing something?
Steven
 

Kansas Bad Man

Well Known and Active Forum User
Non-VOC Member
Craig,

I am glad that you have a more reliable source than me for the enclosures. The SL1 looks very nice.

I do not remember any support for the wiring harness.

For those who are interested Rhode Island Wiring has a complete Series D wiring harness available. It is expensive, but quite nice and very original. It was designed for the open D, but the differences are not major.


It is good to hear of across the counter for sale items with a heads up as to the cost, were to get it and a recommendation as to the quality of
the product.
 
Last edited by a moderator:

davidd

Well Known and Active Forum User
VOC Member
To drill fiberglass, I just use available drills and mask the area. Put the tape on first and transfer the marks from the template. I use a center punch also, but I do not hit it too hard. I use hole saws for holes 5" or less and a jig saw for larger holes. I use an angle grinder with a 4.5" grinding disk for metal to do all the trimming and edge grinding.

Tape the gel coat side and forget the inside, just go slow as you break through allowing the hole saw to cut. What you are trying to prevent by masking is that the saw will grab a glass fiber and yank it hard enough to break off a chip of gel coat. To debur, I use files, half round or more often rat tails. Bevel the edge bearing down only one way when the gel coat is supported by the underlying glass. Debur the under-side but make sure you angle away from the gel coat. When you are trying to locate a hole accurately that you cannot mark with a template, if the hole is big enough, drill a smaller hole and mount the part and peer through the small hole and see how close you are. Mark it and use a round file to enlarge the hole in the direction you need to go. The hand work is slow, but a lot faster than doing metal.

I do most of this outside, for obvious reasons, and I use a fan to blow all the little particles away.

David
 

b'knighted

Well Known and Active Forum User
VOC Member
Craig,
What stops the fairing SL1 pivoting where it attaches to SL3 and tipping forward? Is it just the steering damper extension passing through the instrument panel, or am I missing something?
Steven

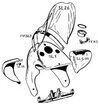
The vertical aluminium extension FF25/1 which screws into the steering head nut FF23 in place of the normal low C FF25 has a tapped hole concentric with the damper rod. A hollow bolt FF81 passes through the headcowl and screws into FF25/1 locating the headcowl. The D damper knob has a leaf spring which engages on the flats of the hollow bolt to serve as the damper detent. A worthwhile improvement is to replace FF81 with a much larger headed bolt so that a sprung ball can be fitted to use the C knob.
This bolt locates the dashboard, the weight of the cowl being carried on the ally column. The cowl is then swung forward and held in place by the ends of the SL3 bracket which is bolted under the lower link. The vertical and centralising alignment of the cowl is determined by the positioning of the holes in the ears of cowl, or in my case by the links between them and the SL3.
 

craig

Well Known and Active Forum User
VOC Member
Craig,
I've seen the photos you've posted of your Comet on theVincent.com, It looks really good.
I haven't any experience with fiberglass but when cutting Plexiglas, lexan, etc .... I put a layer or two of masking tape on each side of where I'm cutting to prevent chipping and scratching. I've got a friend who works in the leisure boat industry, and see what he says, he's worked a quite a with fiberglass boats.
Now my turn to ask a question. What stops the fairing SL1 pivoting where it attaches to SL3 and tipping forward? Is it just the steering damper extension passing through the instrument panel, or am I missing something?
Steven
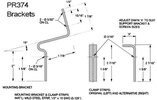
Hi Steven, This is a three point mount for this complete cowl/windscreen/headlamp/etc. Added SL3 provides lower two, upper mount is the extended steering damper bolt. Yes, just a new large, center bored bolt that threads into new extended damper.
 

Attachments

  • SL1SL3.jpg
    SL1SL3.jpg
    18.5 KB · Views: 14
Last edited:

craig

Well Known and Active Forum User
VOC Member
To drill fiberglass, I just use available drills and mask the area. Put the tape on first and transfer the marks from the template. I use a center punch also, but I do not hit it too hard. I use hole saws for holes 5" or less and a jig saw for larger holes. I use an angle grinder with a 4.5" grinding disk for metal to do all the trimming and edge grinding.

Tape the gel coat side and forget the inside, just go slow as you break through allowing the hole saw to cut. What you are trying to prevent by masking is that the saw will grab a glass fiber and yank it hard enough to break off a chip of gel coat. To debur, I use files, half round or more often rat tails. Bevel the edge bearing down only one way when the gel coat is supported by the underlying glass. Debur the under-side but make sure you angle away from the gel coat. When you are trying to locate a hole accurately that you cannot mark with a template, if the hole is big enough, drill a smaller hole and mount the part and peer through the small hole and see how close you are. Mark it and use a round file to enlarge the hole in the direction you need to go. The hand work is slow, but a lot faster than doing metal.

I do most of this outside, for obvious reasons, and I use a fan to blow all the little particles away.

David
Thanks David, I am just concerned about my tooling to do this, I do have hole saws. Other advice has been to 1)center drill with hole saw guide bit, then 2) stop and reverse to allow hole portion of saw to grind thru the gel coat in reverse, then 3)once slowly thru gel coat revert to normal cutting direction. I am out to cut a board to support this dashboard while drilling.
Thanks
Craig
 
Top