Misc: Charging Systems Series ‘C’ Rapide Battery Not Charging

danno

Well Known and Active Forum User
Non-VOC Member
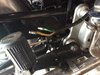
The other question is when Danno fitted a battery to the bike, which way round did he connect it? Standard for a Vincent is usually negative to earth, but if this is a JG regulator which is usually positive earth polarity then the regulator could have been damaged and so not charging if the battery was fitted the wrong way round polarity wise.

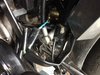
The battery is fitted with positive earth.
 
Last edited:

danno

Well Known and Active Forum User
Non-VOC Member
Just as an update.
Have been checking the wiring which is a bit tricky to get at as it’s under the battery tray.
It may be that one of them disconnected causing the lack of charge. I’m not sure though what leads go where.
Positive earth also adding to the confusion.
The green and yellow leads in the 2nd pic are from the dynamo and the blue, green and black leads in the other pic are from the regulator.
Blue and black leads come from looms I assume from the headlight.

The dynamo leads plug into the blue double joiner and the green one but I’m unsure which way round they go. Green to green would be a good bet.
If I can figure it out and hopefully get a charge again, then I can remake the wiring as it’s quite untidy and vulnerable at the moment.
Any ideas appreciated.
 

Attachments

  • 47A3CDD8-DCE6-44FA-BB16-63D0B54CBFF0.jpeg
    47A3CDD8-DCE6-44FA-BB16-63D0B54CBFF0.jpeg
    351.3 KB · Views: 29
  • 749677B4-3787-4D9D-811C-447919B455D2.jpeg
    749677B4-3787-4D9D-811C-447919B455D2.jpeg
    347.7 KB · Views: 28

vibrac

Well Known and Active Forum User
VOC Member
I would get a clean sheet of paper draw images of your selected components down and draw some lines between them when it works on paper buy some wires and get soldering. you could design negative earth in as well
The alternative is some clip leads a battery a voltmeter and a lot of guessing.
 

bmetcalf

Well Known and Active Forum User
VOC Member
Have you tried looking at post #10? Tracing electrical circuits requires being very methodical, taking notes, and labeling wires. Just take each wire one at a time and don't worry about the others, then move to the next wire.
 

danno

Well Known and Active Forum User
Non-VOC Member
Have you tried looking at post #10? Tracing electrical circuits requires being very methodical, taking notes, and labeling wires. Just take each wire one at a time and don't worry about the others, then move to the next wire.

Thanks for the replies.
Yes, the wiring diagram will be useful.
I’ve just found the original and rather tatty paperwork from the fifties for the JG regulator, magneto replacement unit (Mistral Engineering) and Grosset electric starter manual.
All the colour coded wiring is shown for the charging system so should be able to
reconnect it now.
 
Last edited:

Martyn Goodwin

Well Known and Active Forum User
Non-VOC Member
Just as an update.
Have been checking the wiring which is a bit tricky to get at as it’s under the battery tray.
It may be that one of them disconnected causing the lack of charge. I’m not sure though what leads go where.
Positive earth also adding to the confusion.
The green and yellow leads in the 2nd pic are from the dynamo and the blue, green and black leads in the other pic are from the regulator.
Blue and black leads come from looms I assume from the headlight.

The dynamo leads plug into the blue double joiner and the green one but I’m unsure which way round they go. Green to green would be a good bet.
If I can figure it out and hopefully get a charge again, then I can remake the wiring as it’s quite untidy and vulnerable at the moment.
Any ideas appreciated.

Dos this help??????

BUT - I would forget the JG kit and opt for a 'modern' unit from Paul Geoff http://www.norbsa02.freeuk.com/
 

Attachments

  • VOC JG Sheets 001.pdf
    75.2 KB · Views: 24

danno

Well Known and Active Forum User
Non-VOC Member
Dos this help??????

BUT - I would forget the JG kit and opt for a 'modern' unit from Paul Geoff http://www.norbsa02.freeuk.com/

Thanks. I actually have those instruction sheets in the old paperwork.
The wiring is as fig.3 except that the blue dynamo wire has been changed to a yellow one.
Three connections in all - two between the dynamo and regulator and the black
goes to the ammeter.
On my Rapide though there’s another blue lead from a loom up to the headlight
that connects to the dynamo/regulator wiring junction.
Doesn’t seem to be shown in any of the paper work so will check with a tester.
 

danno

Well Known and Active Forum User
Non-VOC Member
On my Rapide though there’s another blue lead from a loom up to the headlight
that connects to the dynamo/regulator wiring junction.
Doesn’t seem to be shown in any of the paper work so will check with a tester.

It’s ok. It’s for the red ignition/charge light mounted in the headlight.
 

Martyn Goodwin

Well Known and Active Forum User
Non-VOC Member
A charge light was never standard. Get rid of it. That is what the ammeter is for!
Not to confuse but ALL the original wires were Black! So a specific colour means nothing except if you find 2 ends the same colour they may be the same length of wire - but check AND LABEL all.

Not that hard provided you do just ONE at a time and make notes.
 

Attachments

  • wire loom 001.pdf
    32.6 KB · Views: 23
  • wiring Diagram.doc
    627.5 KB · Views: 20
  • miller switch 001.pdf
    299.4 KB · Views: 15
  • VOC Loom.pdf
    203.9 KB · Views: 17
Top